Homemade sushi (maki)

Homemade maki sushi

Our local fishmonger (Bristol Fish Ltd) had some sashimi grade tuna in stock over the recent gloriously hot bank holiday weekend. So I decided on a whim to get some as I hadn’t had sushi for a while. Nothing beats freshly made sushi and they are so easy to make!

Cook your sushi rice according to the packet. If you have a rice cooker then this step will be minimal effort. Prepare the ingredients you want to assemble within your maki roll sushi by cutting them into thin strips, the idea being that you will then line the ingredients up across horizontally on top of your nori seaweed and bed layer of rice, ready to roll.

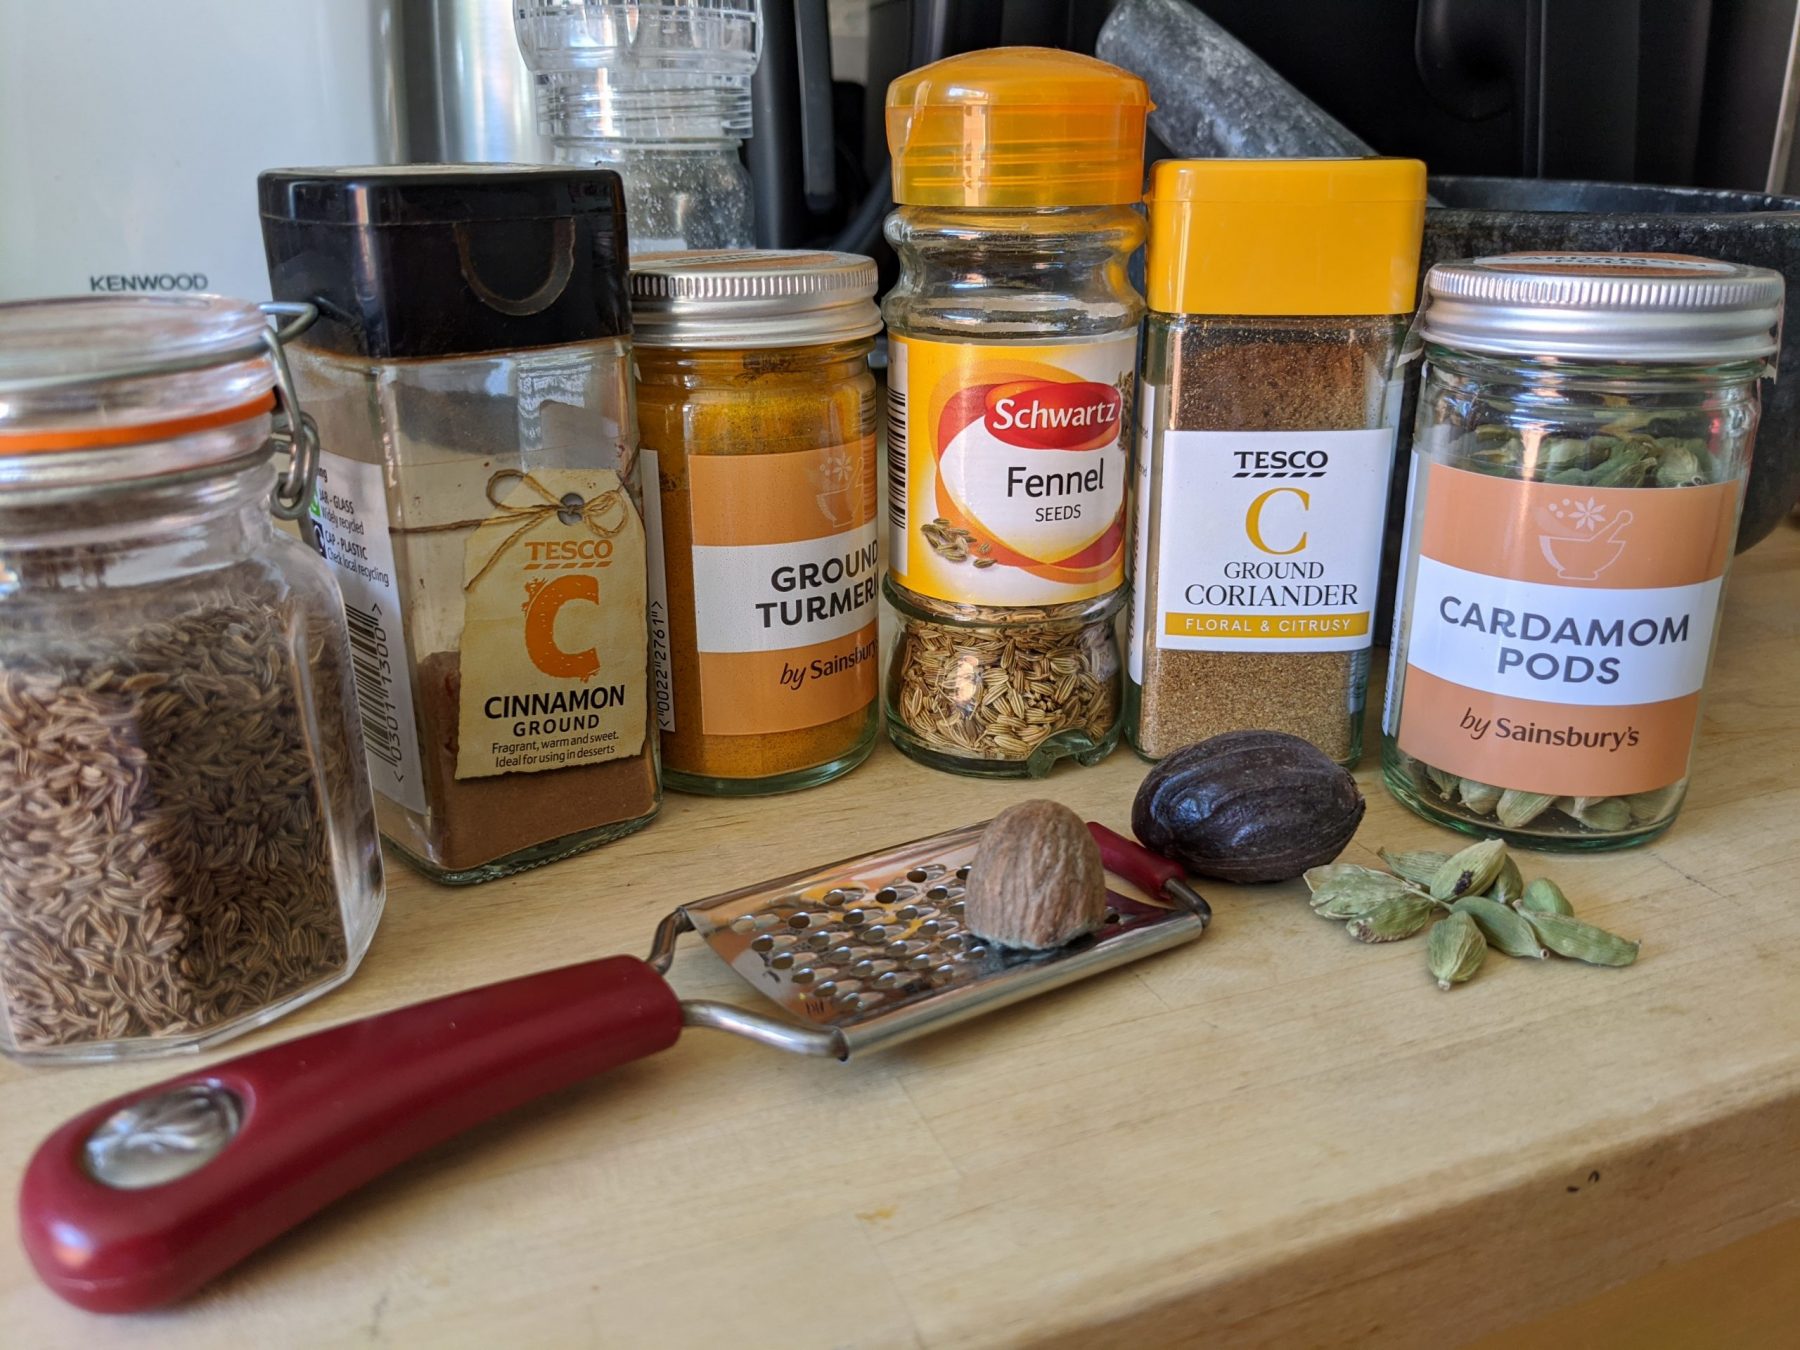
The ingredients I used this time were my sashimi tuna, daikon radish, cucumber and crab sticks. You can pretty much add anything you want into your sushi rolls, even cooked meats like the korean gimbaps.

When your rice is cooked, add sushi vinegar to the rice and mix it up and allow your rice to cool a little bit. Tip: keep your rice spatula or spoon in a mug/bowl of water between scooping your rice, it will stop the rice from sticking to your spoon/spatula. Then you can start rolling. I would recommend using a sheet of cling film between your sushi mat and the nori sheets so that you do not have to keep washing your sushi mat between each roll. Place your nori sheet on top of your cling film, followed by a thin-ish layer of rice, then lay your ingredients across your rice horizontally. Around an inch from the bottom edge of your nori sheet. Now roll up your seaweed cylinder of deliciousness.

Once you have made all of your seaweed cylinders, then it is time to cut them up into the bite size maki rolls that one is more familiar with. Tip: wet your knife when cutting the rolls to stop the rice from sticking.

Now enjoy it with a bit of wasabi and sushi soy sauce. A cold beer also goes nicely…

Happy eating!

Share this:

Spiced lamb kebabs

With minimal prep ahead of time, this is a meal that can be ready quickly with flavours that pack a punch.

I usually use lamb neck fillet as I find the marbling throughout somewhat self-bastes whilst grilling keeping the meat tender. I frequently find recipes and tips out there where they advise lamb neck is best left for slow cooking as otherwise it will be tough. But having made these kebabs for a number of years now, I can say the neck is one of the best cuts to use for these kebabs. By all means try other cuts of lamb that you can get your hands on, but look for cuts that have some marbling of fat/fascia through the meat. If your lamb neck comes boned, then first de-bone your neck and cut them into chunks that are big enough to skewer through. Remember – the meat shrinks after cooking so make them slightly bigger than the pieces you’d like to eat.

Now for the marinade. You can’t really go wrong with the usual spices like cardamom, turmeric, cumin and the like. Using a pestle and mortar to bash any whole spice releases their flavours. But you can also use pre-grounded spices from a bottle, or a mixture like I did. Add some salt in your pestle and mortar to add some additional surfaces for your spices to grind against – that’s also some of your seasoning done. Add some olive oil to your spice mix to the consistency of a thickish sauce, you want it to be runny enough to be able to coat all your lamb pieces. This is the only oil you will use on the kebabs and most of it will drip off during the grilling process so don’t be shy.

I always use either a zip-lock bag or a plastic food container to do my marinades in. They don’t leak and you can leave them in the fridge to marinade away without using an awkwardly shaped bowl that takes up valuable tetris gaps on your fridge shelves. Just a couple of tips though – if you’re using marinades that might stain such as turmeric, either use a disposable zip-lock bag or a food container that you don’t mind staining! Zip-lock bags are also great for ‘massaging’ the marinade into the meats without getting your hands dirty. Pop in the meat, pour in the marinade, zip and massage the bag away.

Leave your lamb to marinade in the fridge for an hour or so, longer if possible. I usually marinade around lunchtime (if on a weekend for example) then make it for dinner. Otherwise, you can also make it the night before and leave it marinating overnight for dinner the following day. If you have too much lamb neck fillets for one meal, you can also marinade it all and make them over a couple of evenings. 

Tip for wooden skewers – soak them in water thoroughly before use, both ends! Otherwise, the exposed ends with burn to a crisp under the grill and you won’t have anything to hold the kebabs with. 

When you’re ready, prep some veg to be skewered with the lamb. Onions, peppers, tomatoes and even courgettes are good spacers. Assemble the skewers, alternating between veg and meat or whatever combination takes your fancy and use a piece of your lamb to dot some of your oily marinade on the veg after they have been skewered. 

Place under the grill for about 15 – 20 minutes turning once in between. 

Serve with some grilled halloumi and a salad if you like. Happy eating!

See the full recipe

Share this:

Drive thru not opened? cravings satisfied ✓

McDonalds has done the responsible thing by closing their restaurants during these unprecedented and worrying times caused by the devastating SARS-CoV-2 virus. However, that doesn’t mean that my, although fortunately for my wallet only very occasional, craving for a Sausage and Egg McMuffin doesn’t rear its tempting head during this time. My cravings were added to with the emergence of McDonalds’ own recipe for the Sausage and Egg McMuffin surfacing online so I decided to give it a go one Sunday morning rather than a cooked breakfast.

Turns out it was very easy to make! In some ways, it was quicker to make it myself than spending time deciding whether or not to halt a Sunday morning lie-in, get dressed, decide whether to get in the car and drive to McDonalds only to end up with a disappointing McDonalds breakfast 9 times out of 10 as you open that grease soaked paper wrapping to find the squished muffin inside, vowing never to buy McDonalds breakfast again – a mantra that you’ve repeated quietly to yourself numerous times before…

The sausage meat patty could have been a little neater and flatter, the poached egg could be less dome-shaped (that was the shape of our egg poacher!) but apart from that, it was a roaring success that my craving was very happy with! I used a very roughly measured 100g of sausage meat per muffin (by literally separating the 400g pack in half for my two muffins), adding a sprinkle of salt and pepper then placed the patties under the grill for about 8 minutes each side. Poached two eggs, toasted the muffin halves before slathering in butter and placing a slice of cheese on. Assemble, then chomp!

If you don’t have sausage meat, just substitute it with sausages and remove the casing . There – you have sausage meat! The sausages are normally quite well seasoned anyway so you might find that you don’t even have to add any seasoning to your patties, for example if it’s a sausage brand that you like the taste of usually anyway.

Although it doesn’t come with the greasy yet tantalising hash brown that you get from a McDonald’s breakfast meal, I can probably bet that your homemade coffee will be a much welcomed companion to your homemade sausage and egg muffin.

Washing up excluded!

Share this:

Home-made kimchi

My other half and I have been eating a lot of kimchi lately so I thought I’d give it a go myself. I don’t know much about Korean food but it’s definitely a cuisine that I’ve wanted to find out more about for a while as it’s always so delicious whenever I get a chance to eat it. My husband was recently given a copy of Maangchi’s Real Korean Cooking. As with any cookbooks he’s been given (including Snoop Doggs’ – the fried chicken looks delicious) , I’m usually the one getting the most out of them!

I had not come across Maangchi before but this book introduced me to her blog of her mouth-watering Korean home dishes. I was also pleased to read that she is a fellow gamer and that’s where her name came from.

Anyway, I decided to give her kimchee receipe a go once I found a few mason jars.

I used 4 small chinese cabbages as I was unable to get Napa cabbages that Maangchi recommended. As you’ll see, the salting process really does shrink the cabbages quite a bit. The 4 cabbages filled 4 x 950ml mason jars so hopefully that will help you work out how much you want to make. The rinsing off of the salt once you have salted the cabbage was quite a time consuming step and doing on a cold day with the running water didn’t help. But I tried to squeeze the water out of each quarter of the cabbage as much as possible because I didn’t want any excess water to be in my kimchi as I understood the fermenting process will draw any further water out from the cabbage as it is. I even used a clean tea towel to soak off any excess water once I squeezed the cabbage.

The kimchi paste was a bit fiddly and I probably could have used the food processor next time rather than hand mashing the garlic, ginger and onions. My newly purchased mandolin (and finger guard!) really speeded up the match-sticking process of the radish and carrots though.

The kimchi paste smelled so delicious as I was smearing it amongst each leaf I had to stop myself from devouring most it! I had made kimchi once before when I visited Korea years ago (only the smearing paste on the cabbage part mind), so I remembered that it was important to get the paste down to the stems of each leaf before folding the quarters back together again. Once they were in the jars, they were ready to ferment!

What would I change next time? I’d probably think about using the food processor for some of the bits for the paste. I’d also think about pre-cutting the cabbages before smearing the paste on, although the leaves may not hold the paste as well when they’re cut. I’ll see once this batch has been tried and eaten!

Now we wait…

Share this:

Chin wagging with wine and tapas at Bar 44

Recommended to this place by a fellow foodie. We needed a place for a good post-work chin wag after a hard week at work. The snazzy yet cozy decor and friendly staff as soon as you open the door was a lovely welcome. Not to mention the sight of a few jamon legs hanging from the ceiling – I knew I was at the right place.

Boquerones, Tomatoes with herb migas, Patata Bravas, Pulpo (Octopus) with a tomato and avocado salad, Padron peppers amongst other things were all delicious and perfect for grazing washed down with a delicious organic red wine.

The gooey, smelly Extremadura cheese (Baked torta de barros to share) is a must for baked camembert lovers.

The tortilla was interesting in that it was served slightly gooey in the middle. It’s an acquired texture and probably not one for those who don’t like runny eggs.

Lovely evening all in all. Happily eat (and drink) there again.

Bar 44, Clifton branch, Bristol

Share this: